In this article, we are going to cover market taking which will be relevant for all those looking to trade on the new Perpetual Protocol V2, which if you haven’t tried it yet, is exceptional.
Just to recap, the new V2 has been deployed on Optimism, so boasts low fees and extremely quick transactions, perfect for leverage trading. The new UI, which you will see below, also has a very familiar feel. All-in-all, the protocol offers a centralised experience, while being on-chain, which is great.
Bridging to Optimism -
As I mentioned, Perp V2 is on Optimism so you will need to bridge funds over to layer 2 to get started. You can head to the optimism bridge HERE to get started.
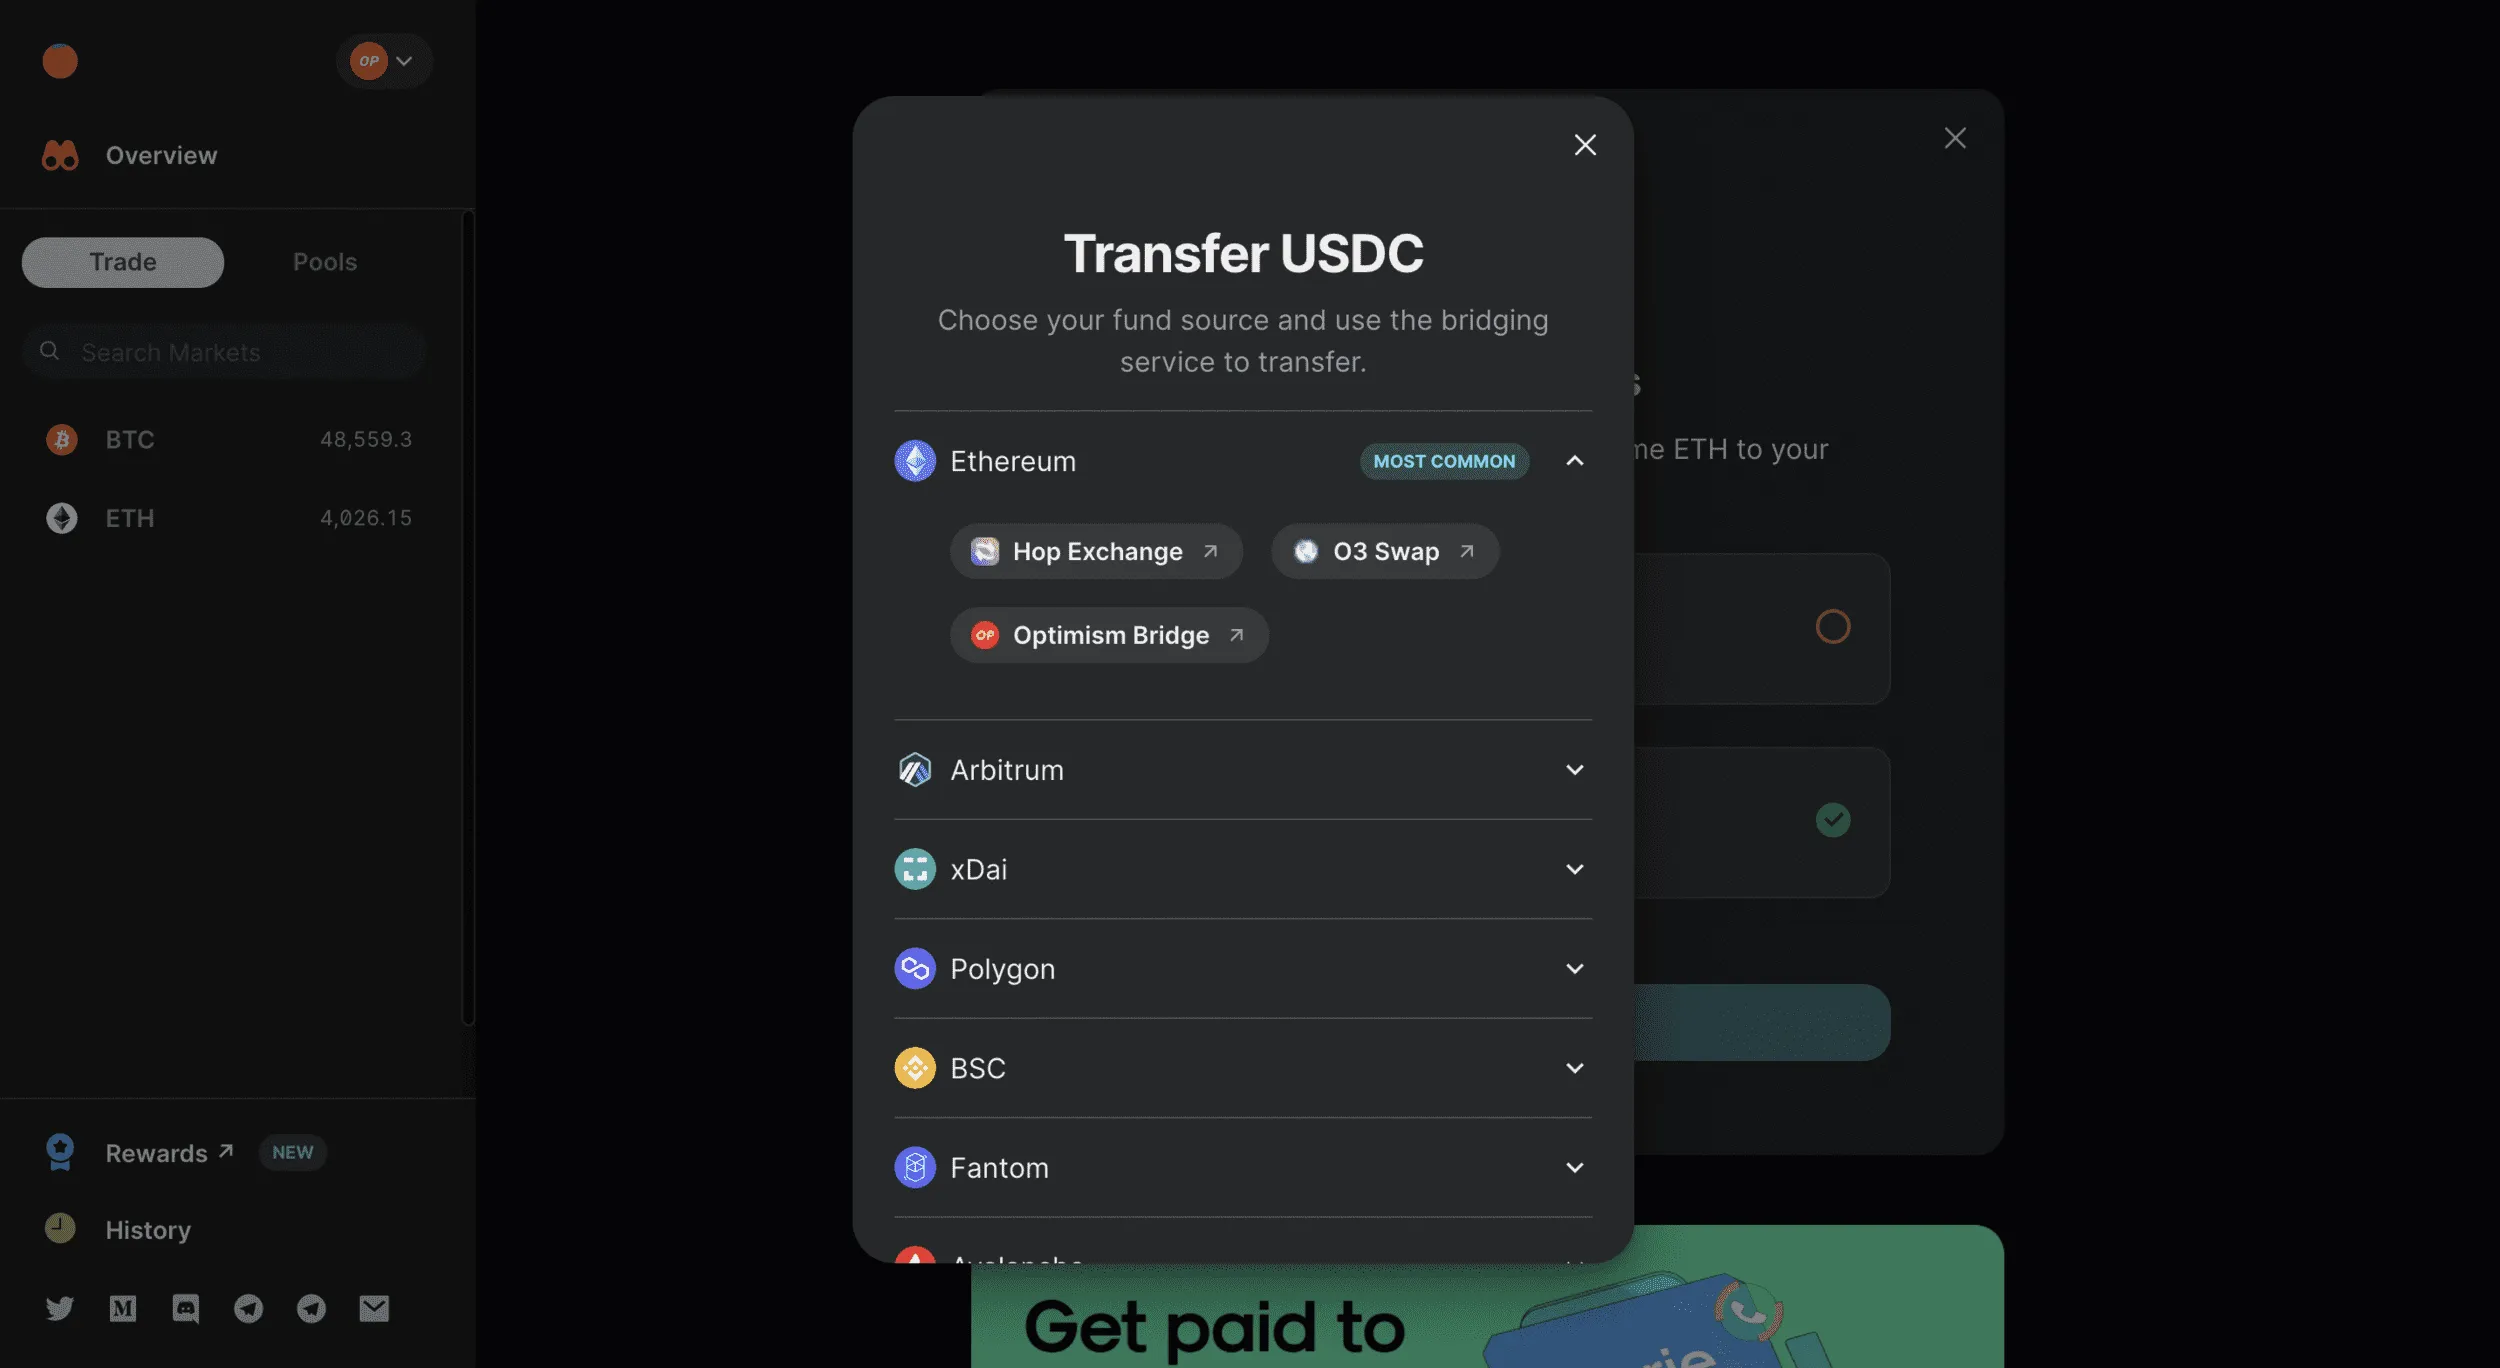
Also, this is another feature I love. You can bridge USDC from multiple chains of choice. Simply connect your wallet and head to the bridge.
Please verify this link before using the bridge, there are some shady characters out there.
Metamask Configuration for Optimism -
Network Name: Optimistic Ethereum
New RPC URL: https://mainnet.optimism.io
Chain ID: 10
Currency Symbol: ETH
Block Explorer URL: https://optimistic.etherscan.io
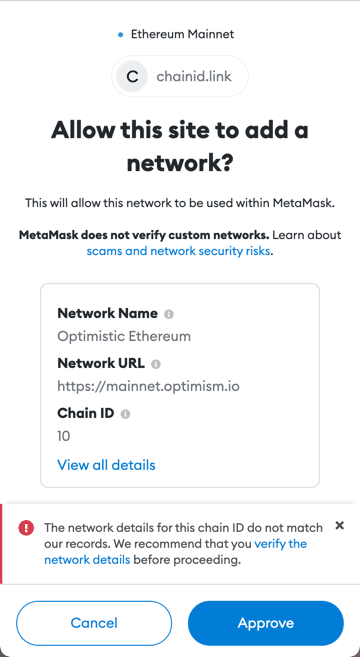
Again, please verify this info before inputting this into your Metamask.
Or to save you a job, just go directly to https://app.perp.com/ and head to their new V2 app, this should prompt you to configure your Metamask directly to Optimism.
From here you can deposit your assets from Ethereum mainnet to Optimism.
I’m pretty happy about the UI for bridging to Optimism…
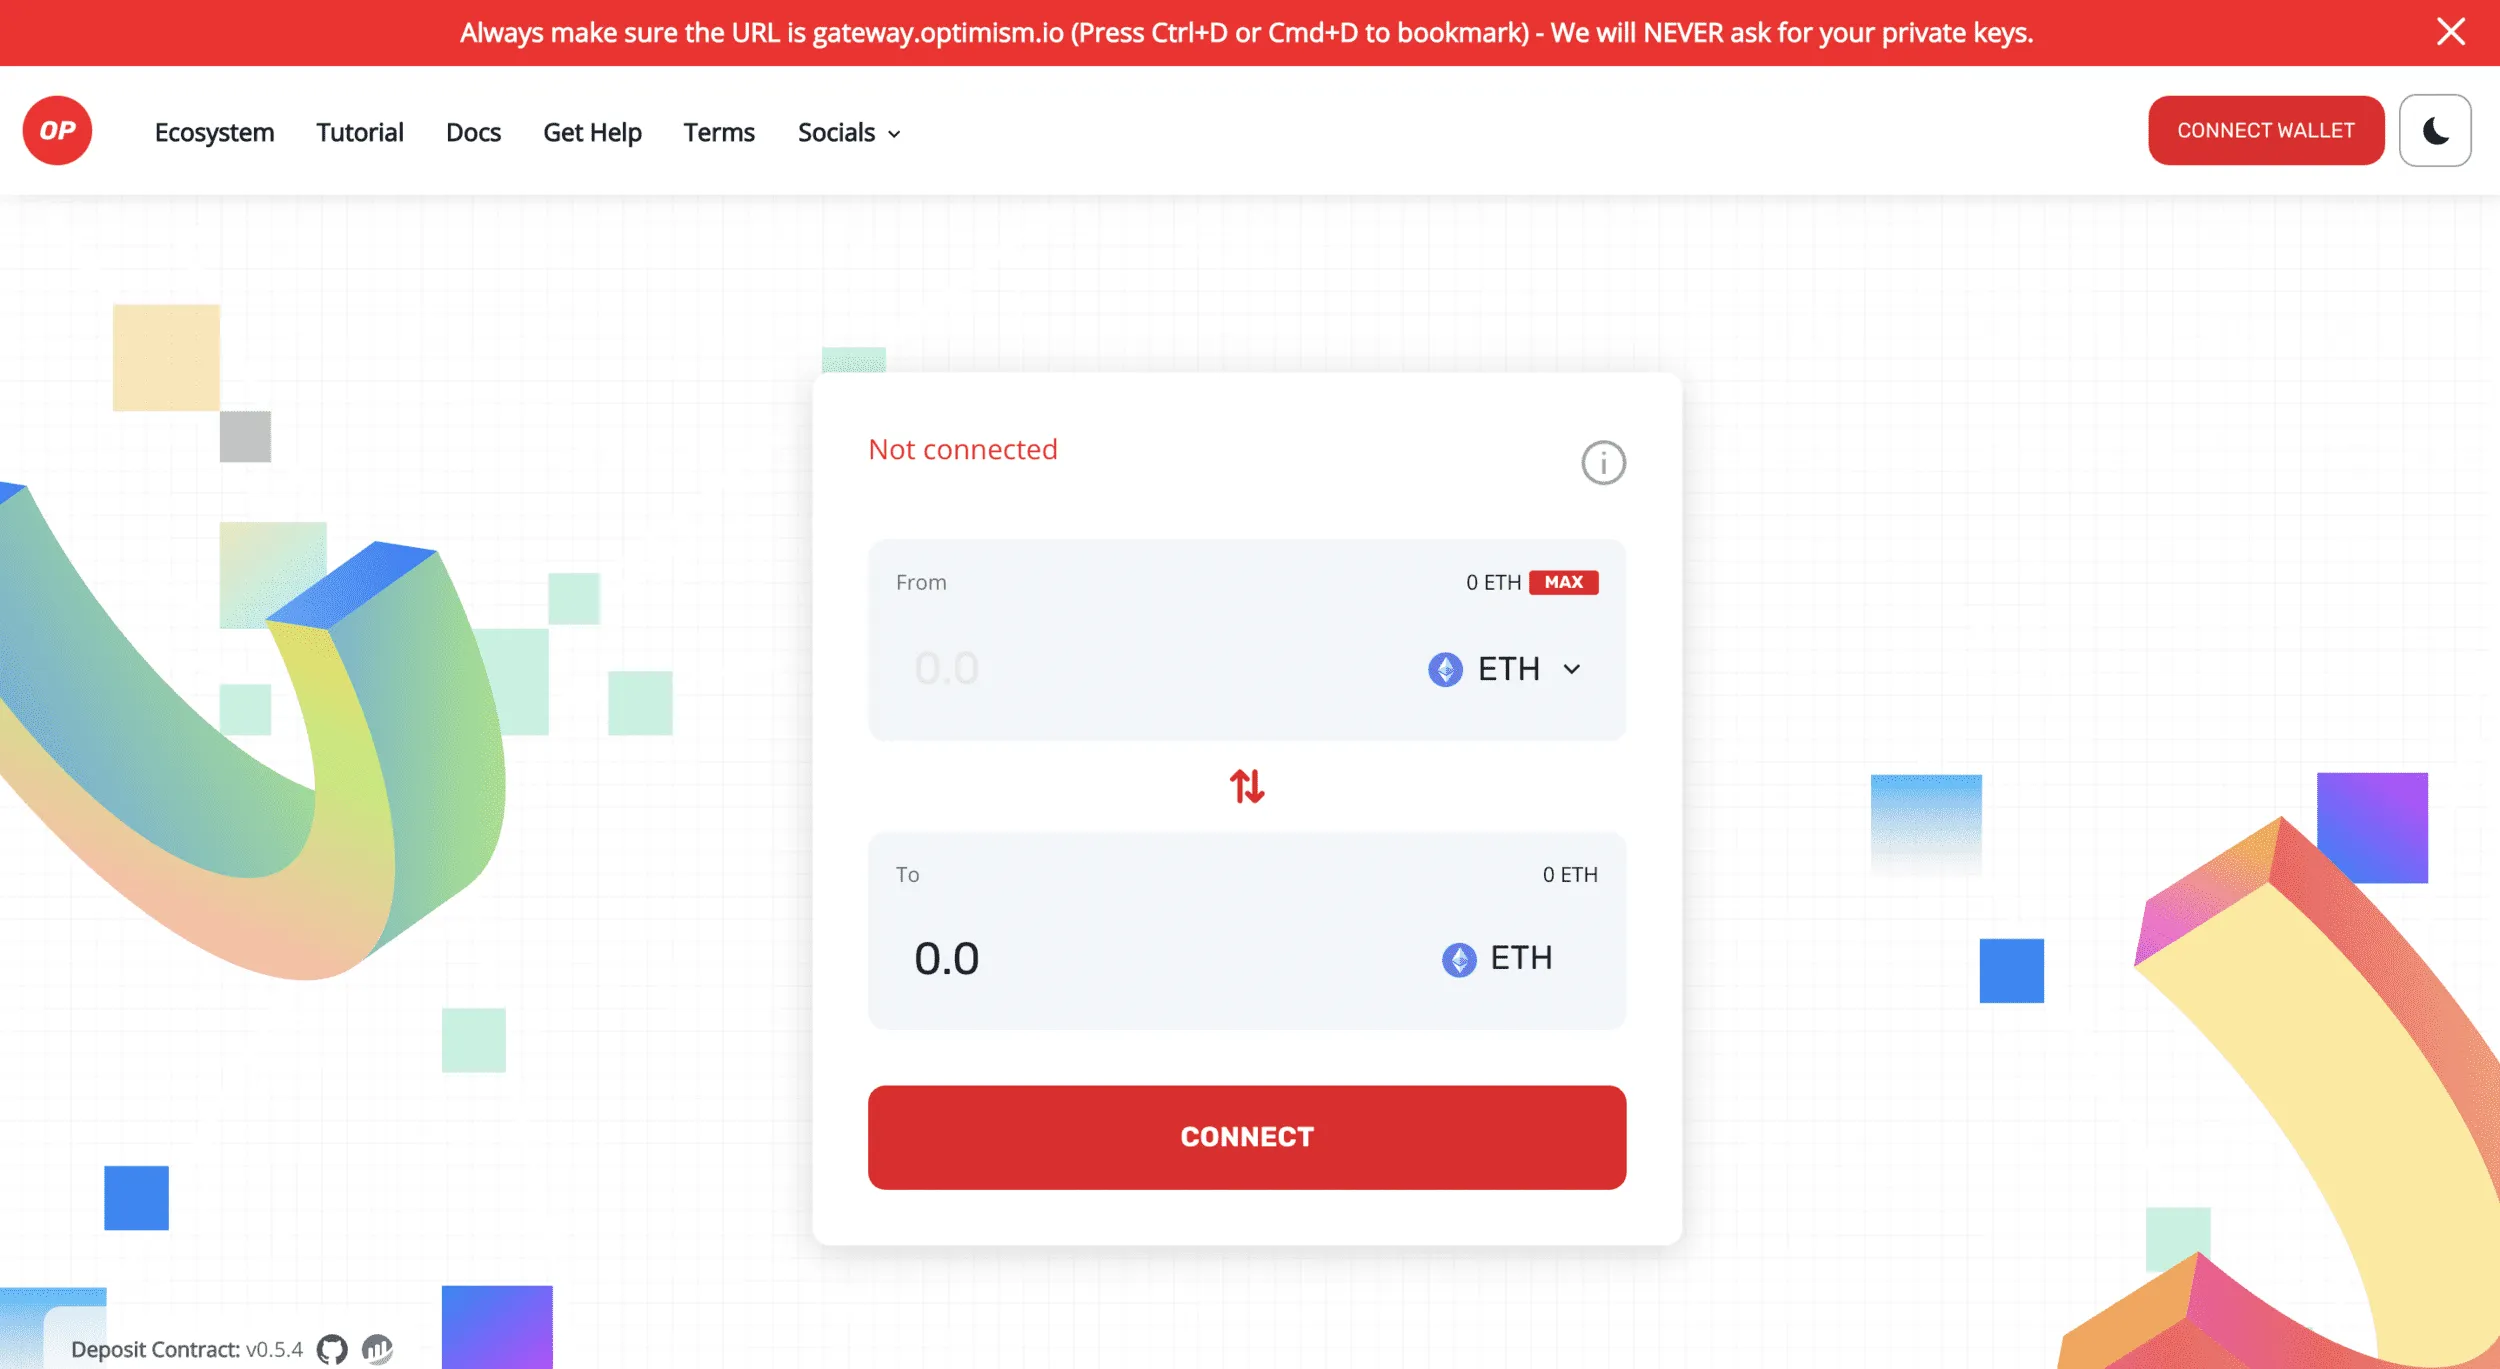
I’d recommend sending ETH over and trading to USDC whilst you are on Optimism with cheap fees and speedy transactions.
Right, so now you have your funds onto Optimism, you are good to go.
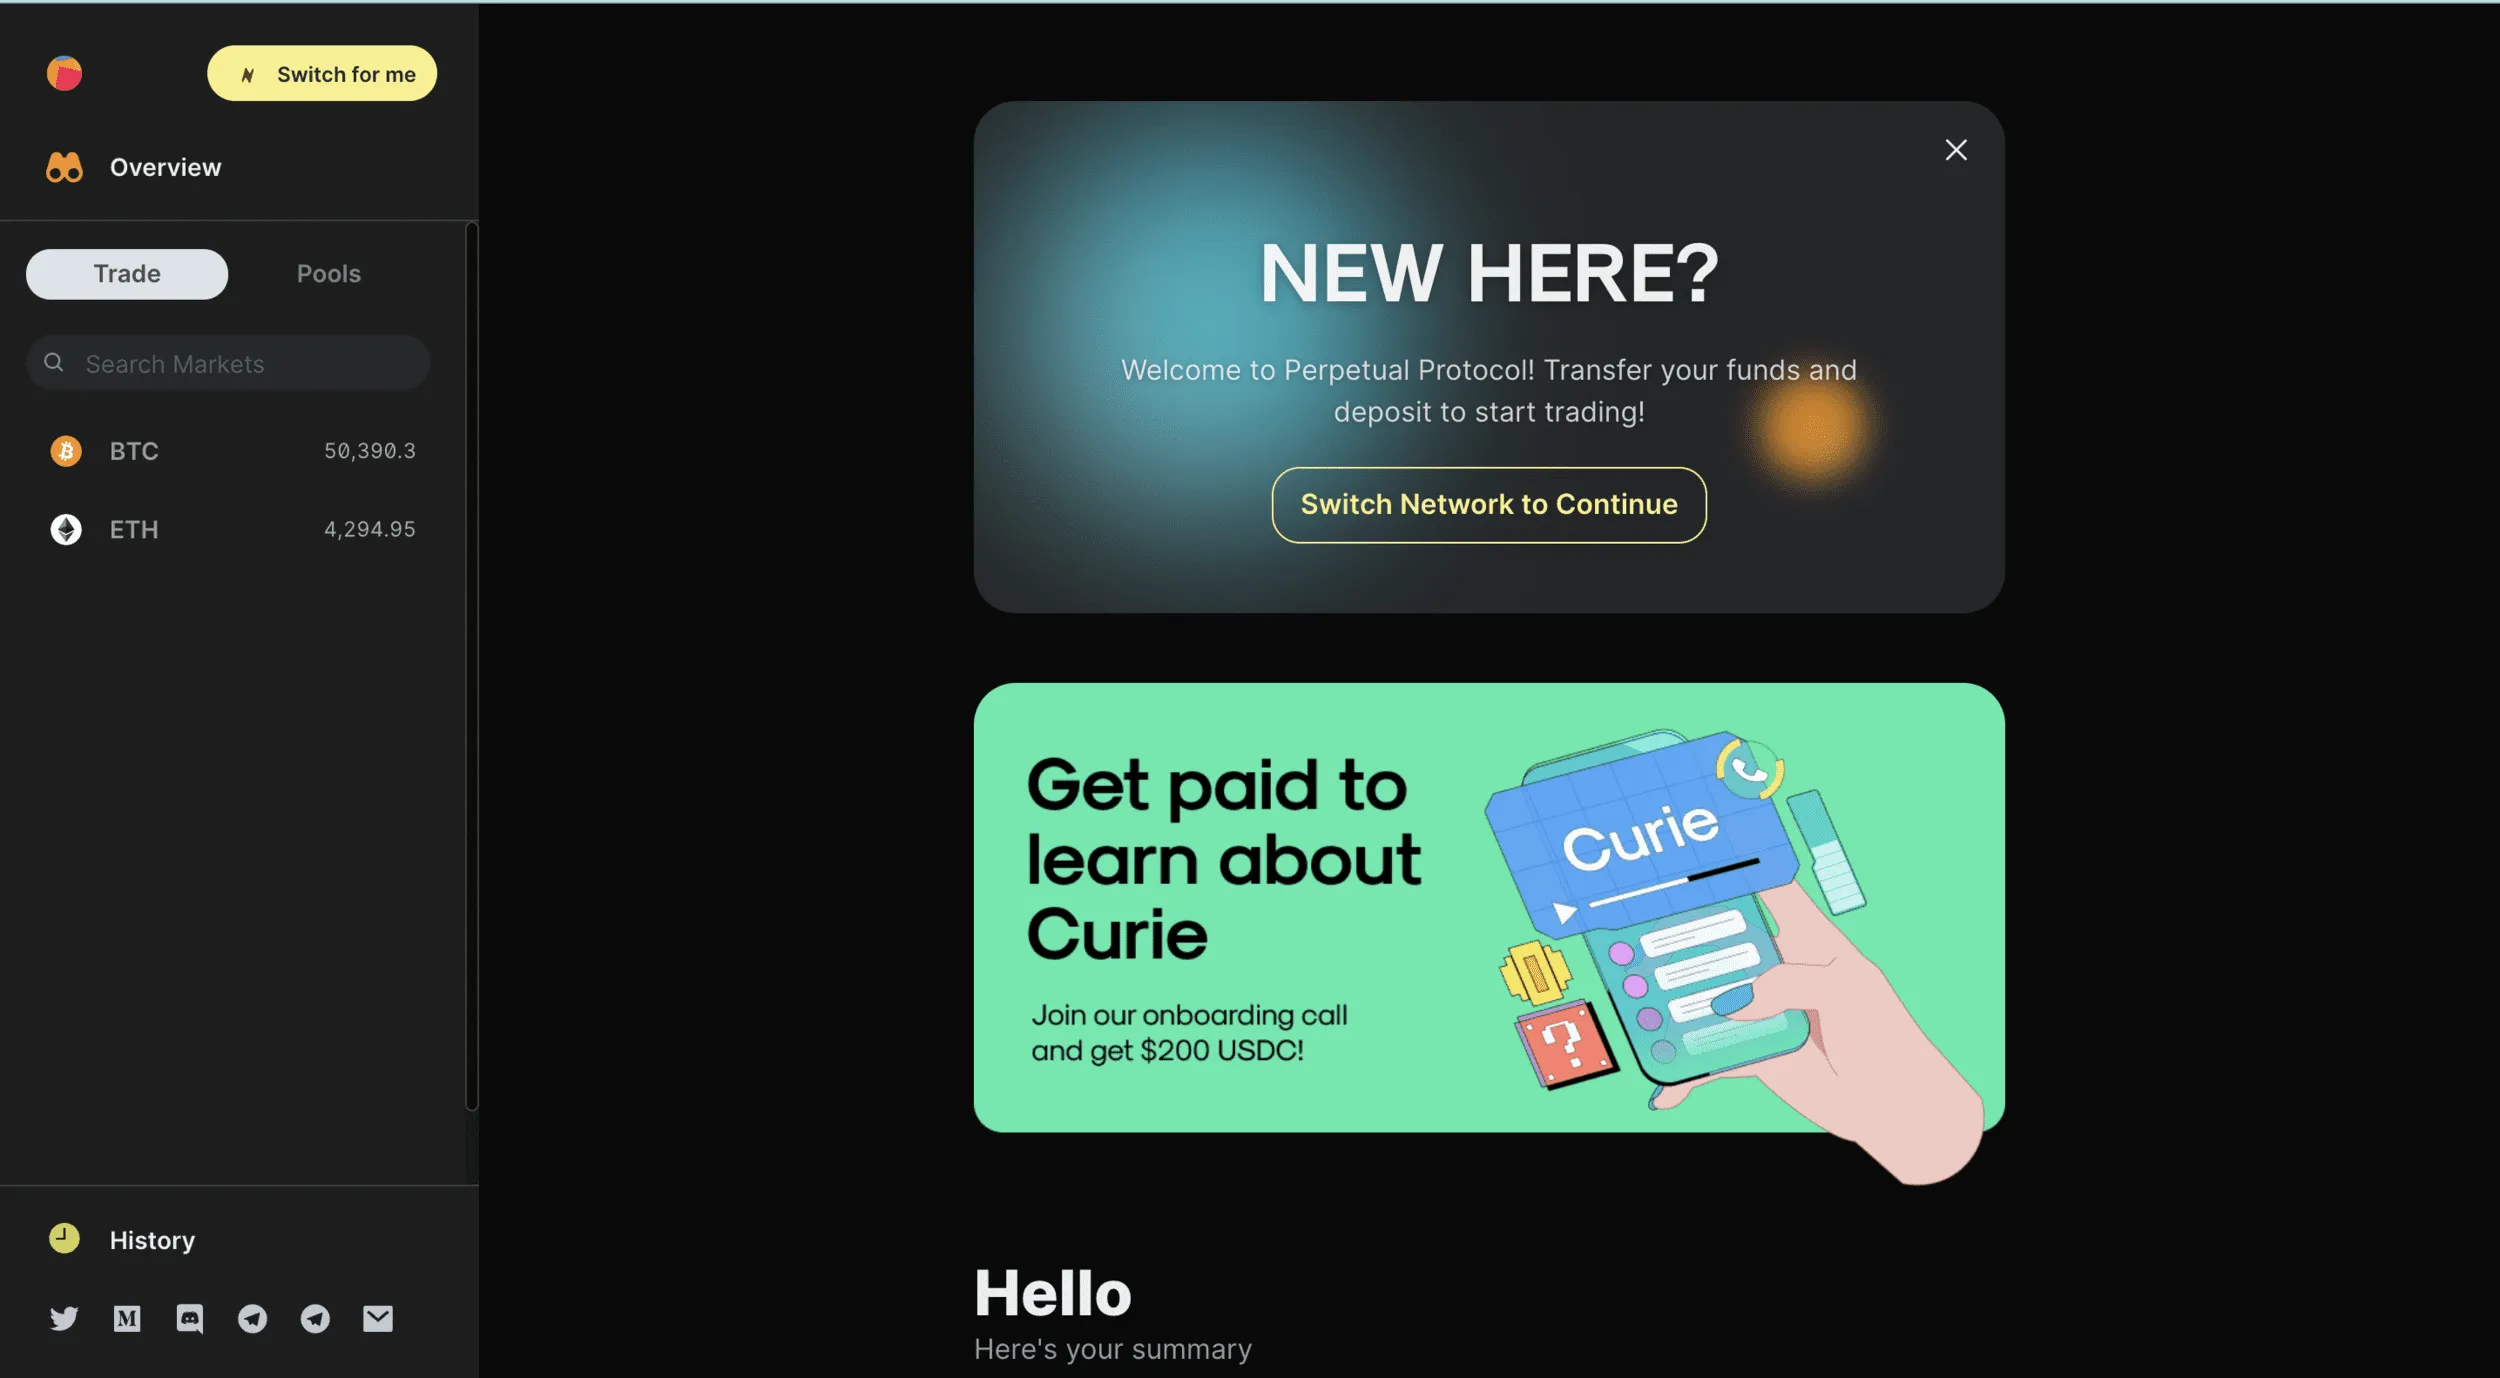
You are going to want to head to Perp V2 using THIS LINK.
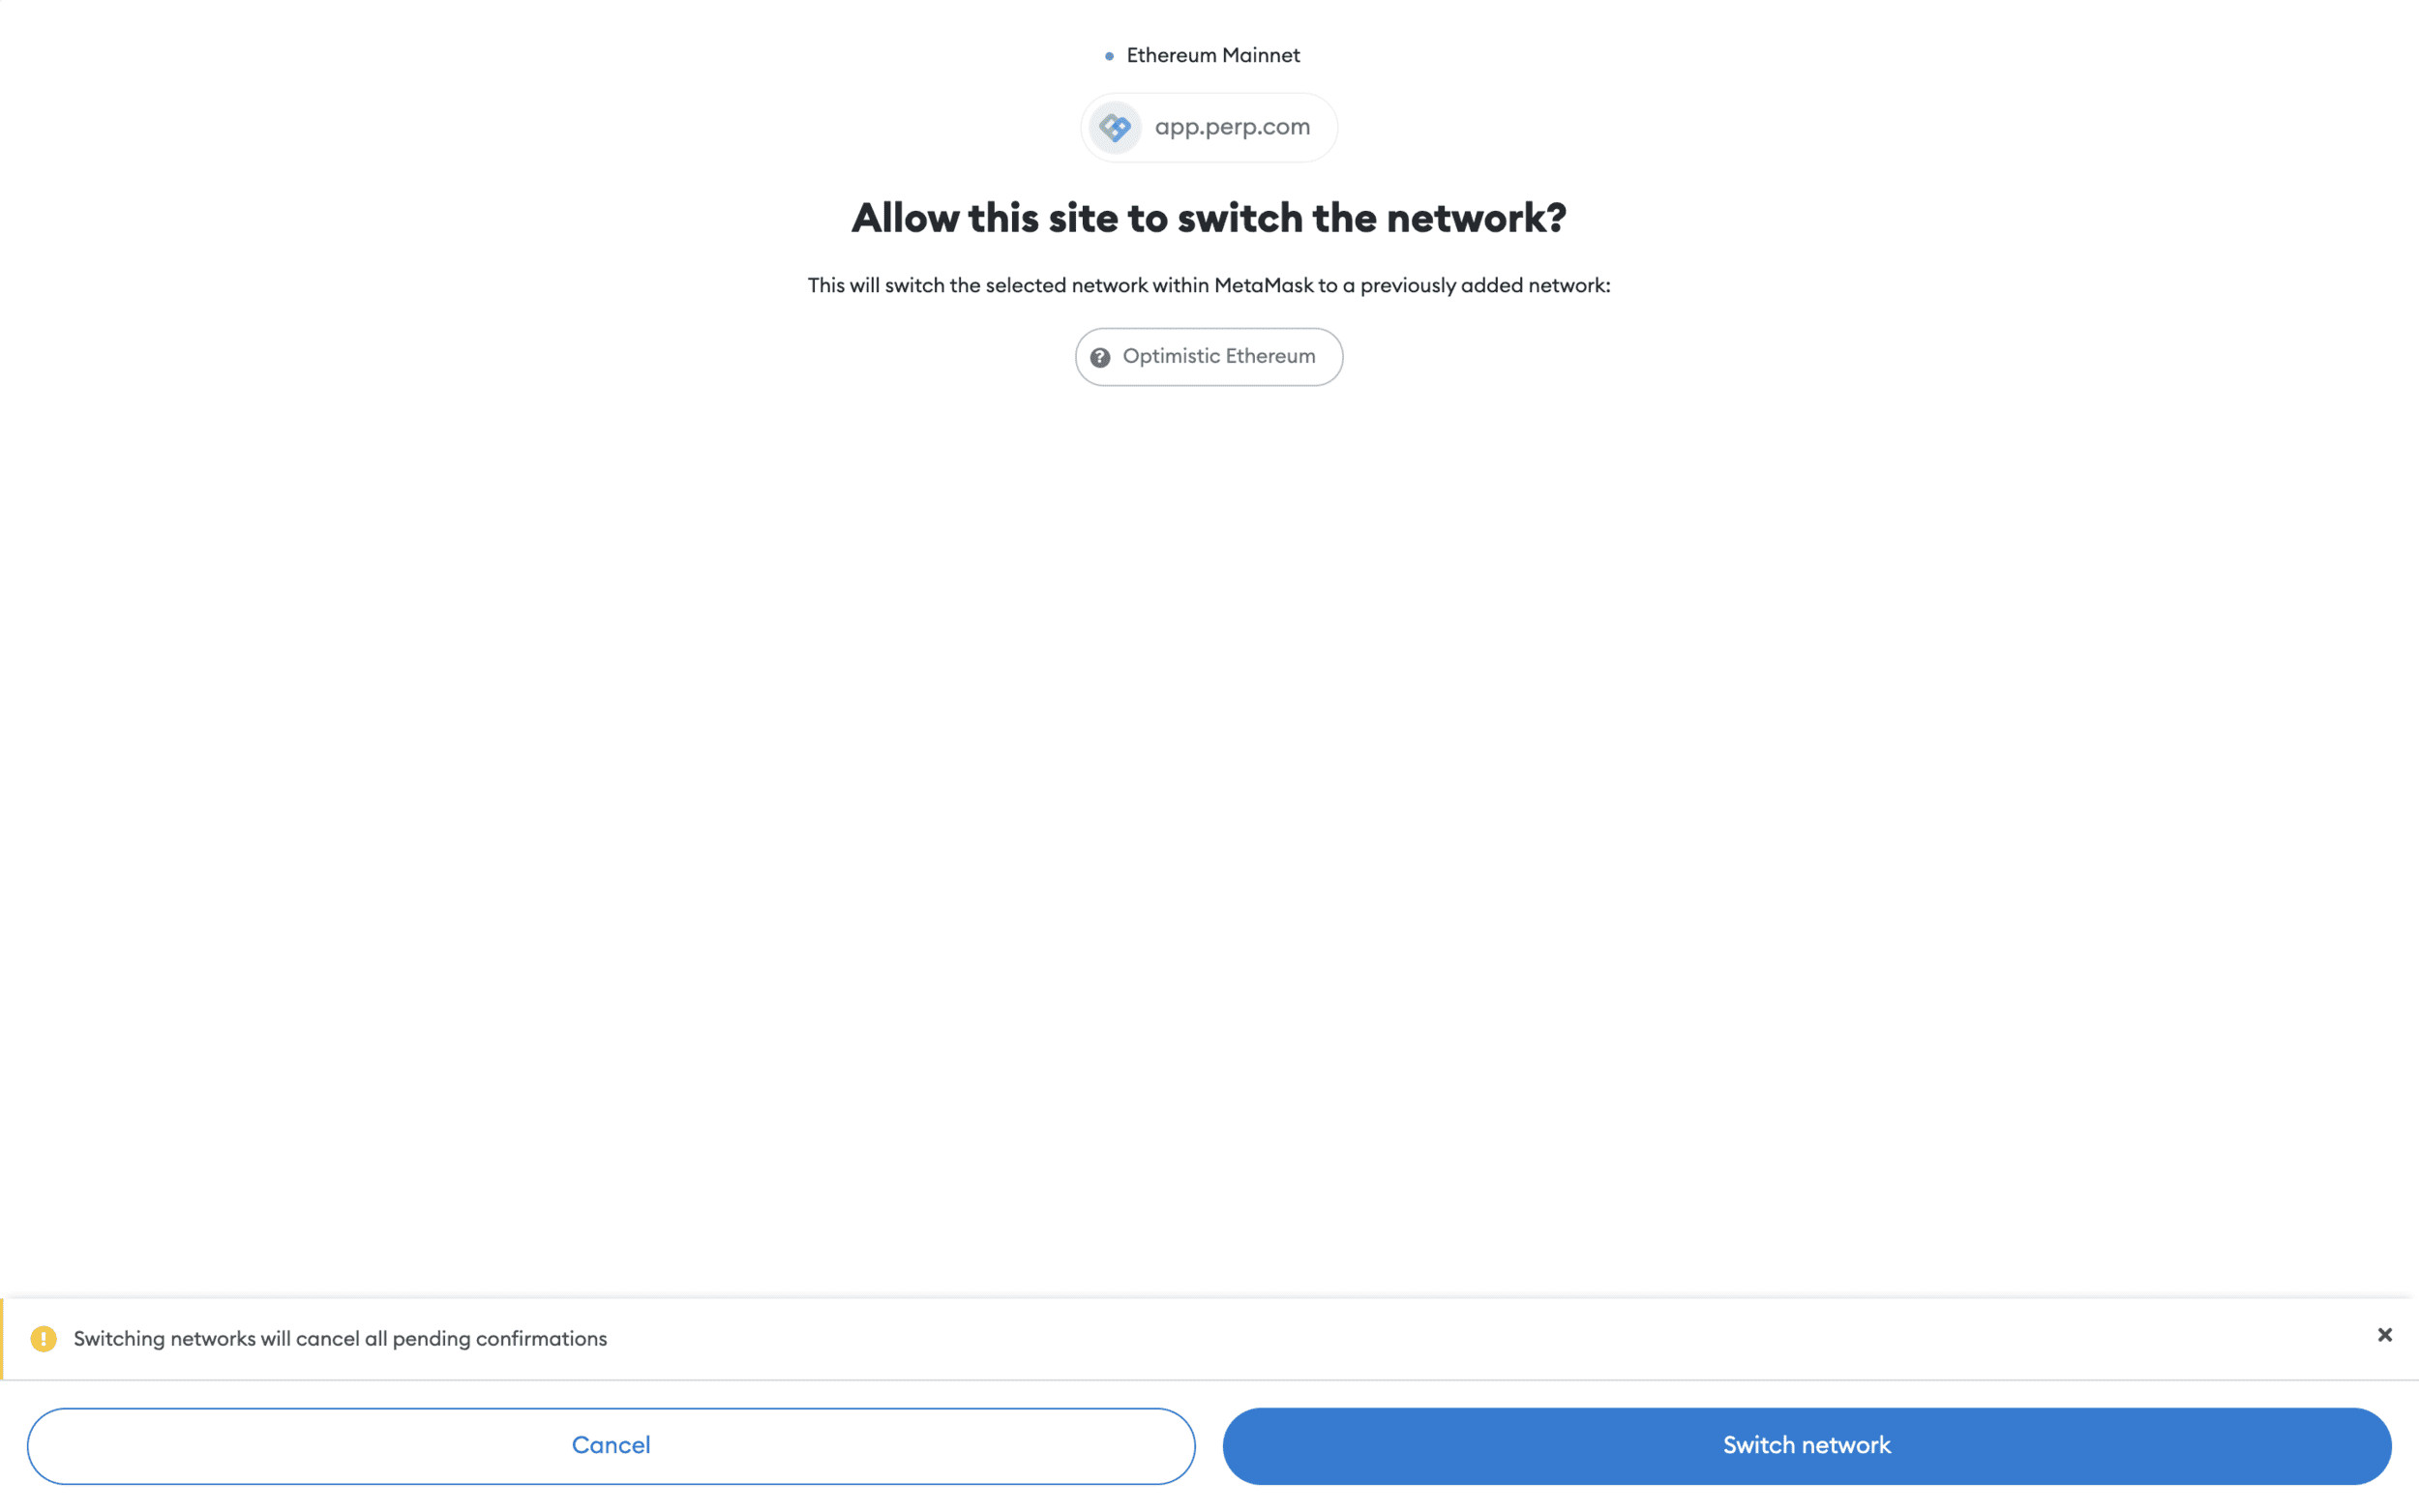
If you head to the top left you can use the “Switch for me” function to swap over to Optimism through your Metamask.
This will bring up a prompt in your wallet which you can simply Switch Network.
Now you have your funds in your Metamask (configured to Optimism), you are ready to trade.
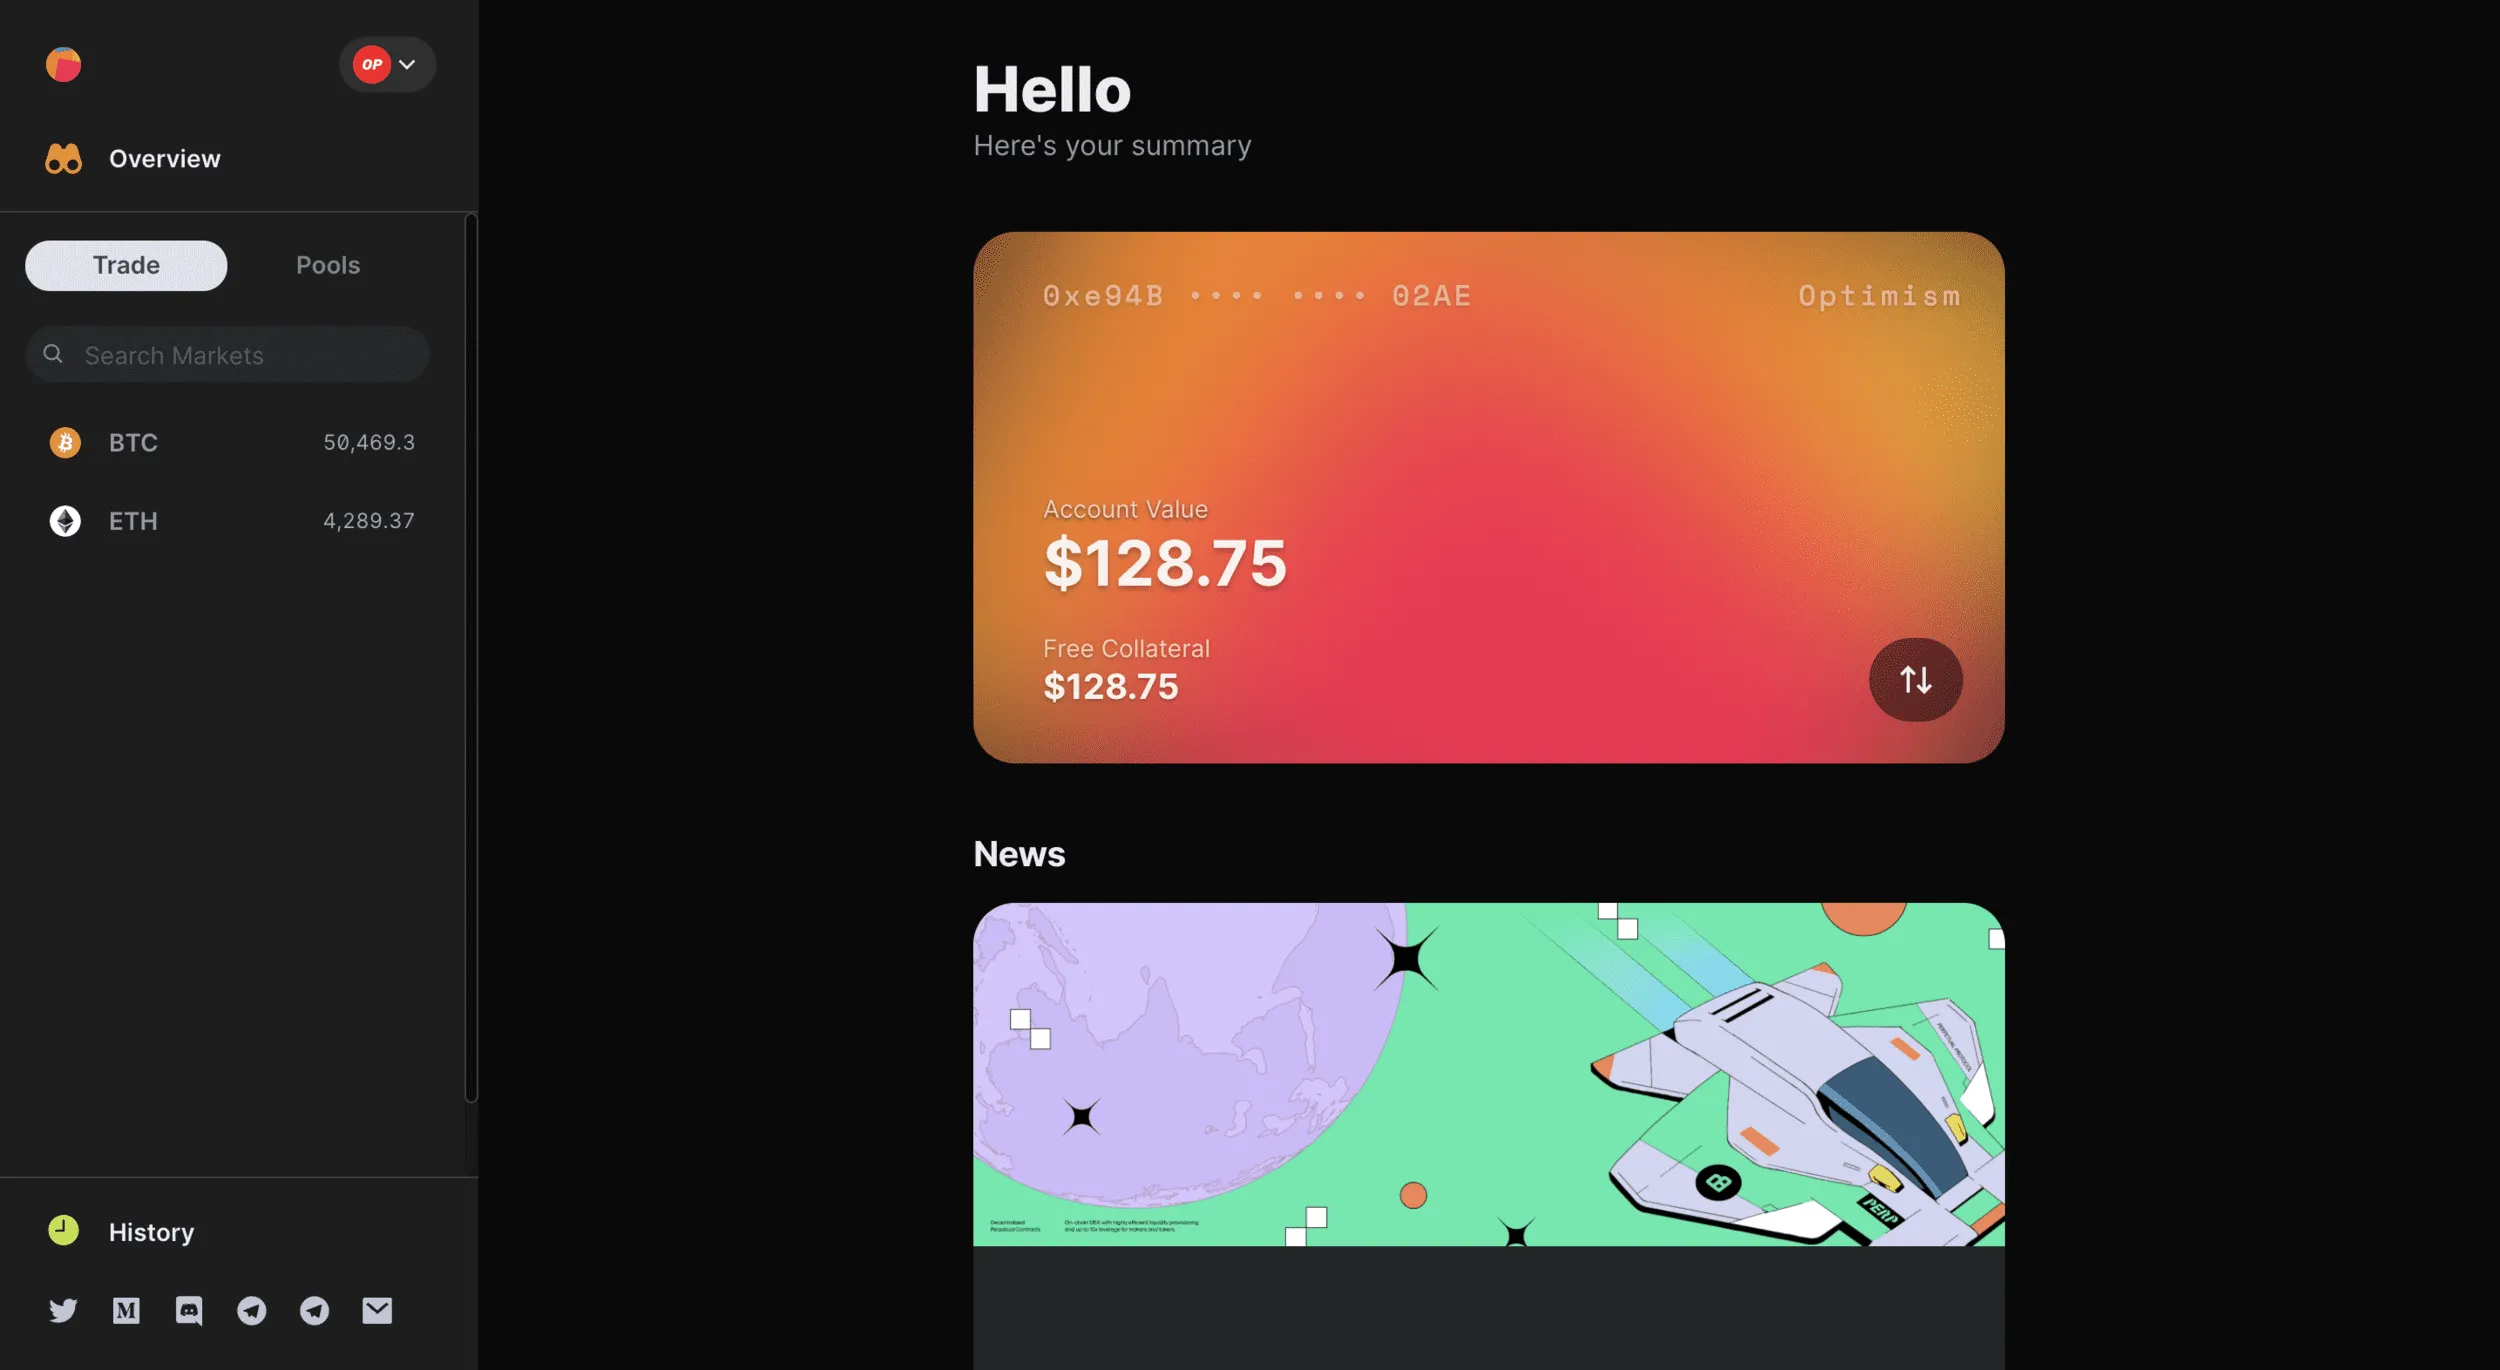
The overview page gives you a bird’s-eye view of your balance and the current markets. For now, BTC and ETH perps are available to trade, with permissionless markets on the horizon.
For this walkthrough, I will show you how to open and close a trade using the ETH market.
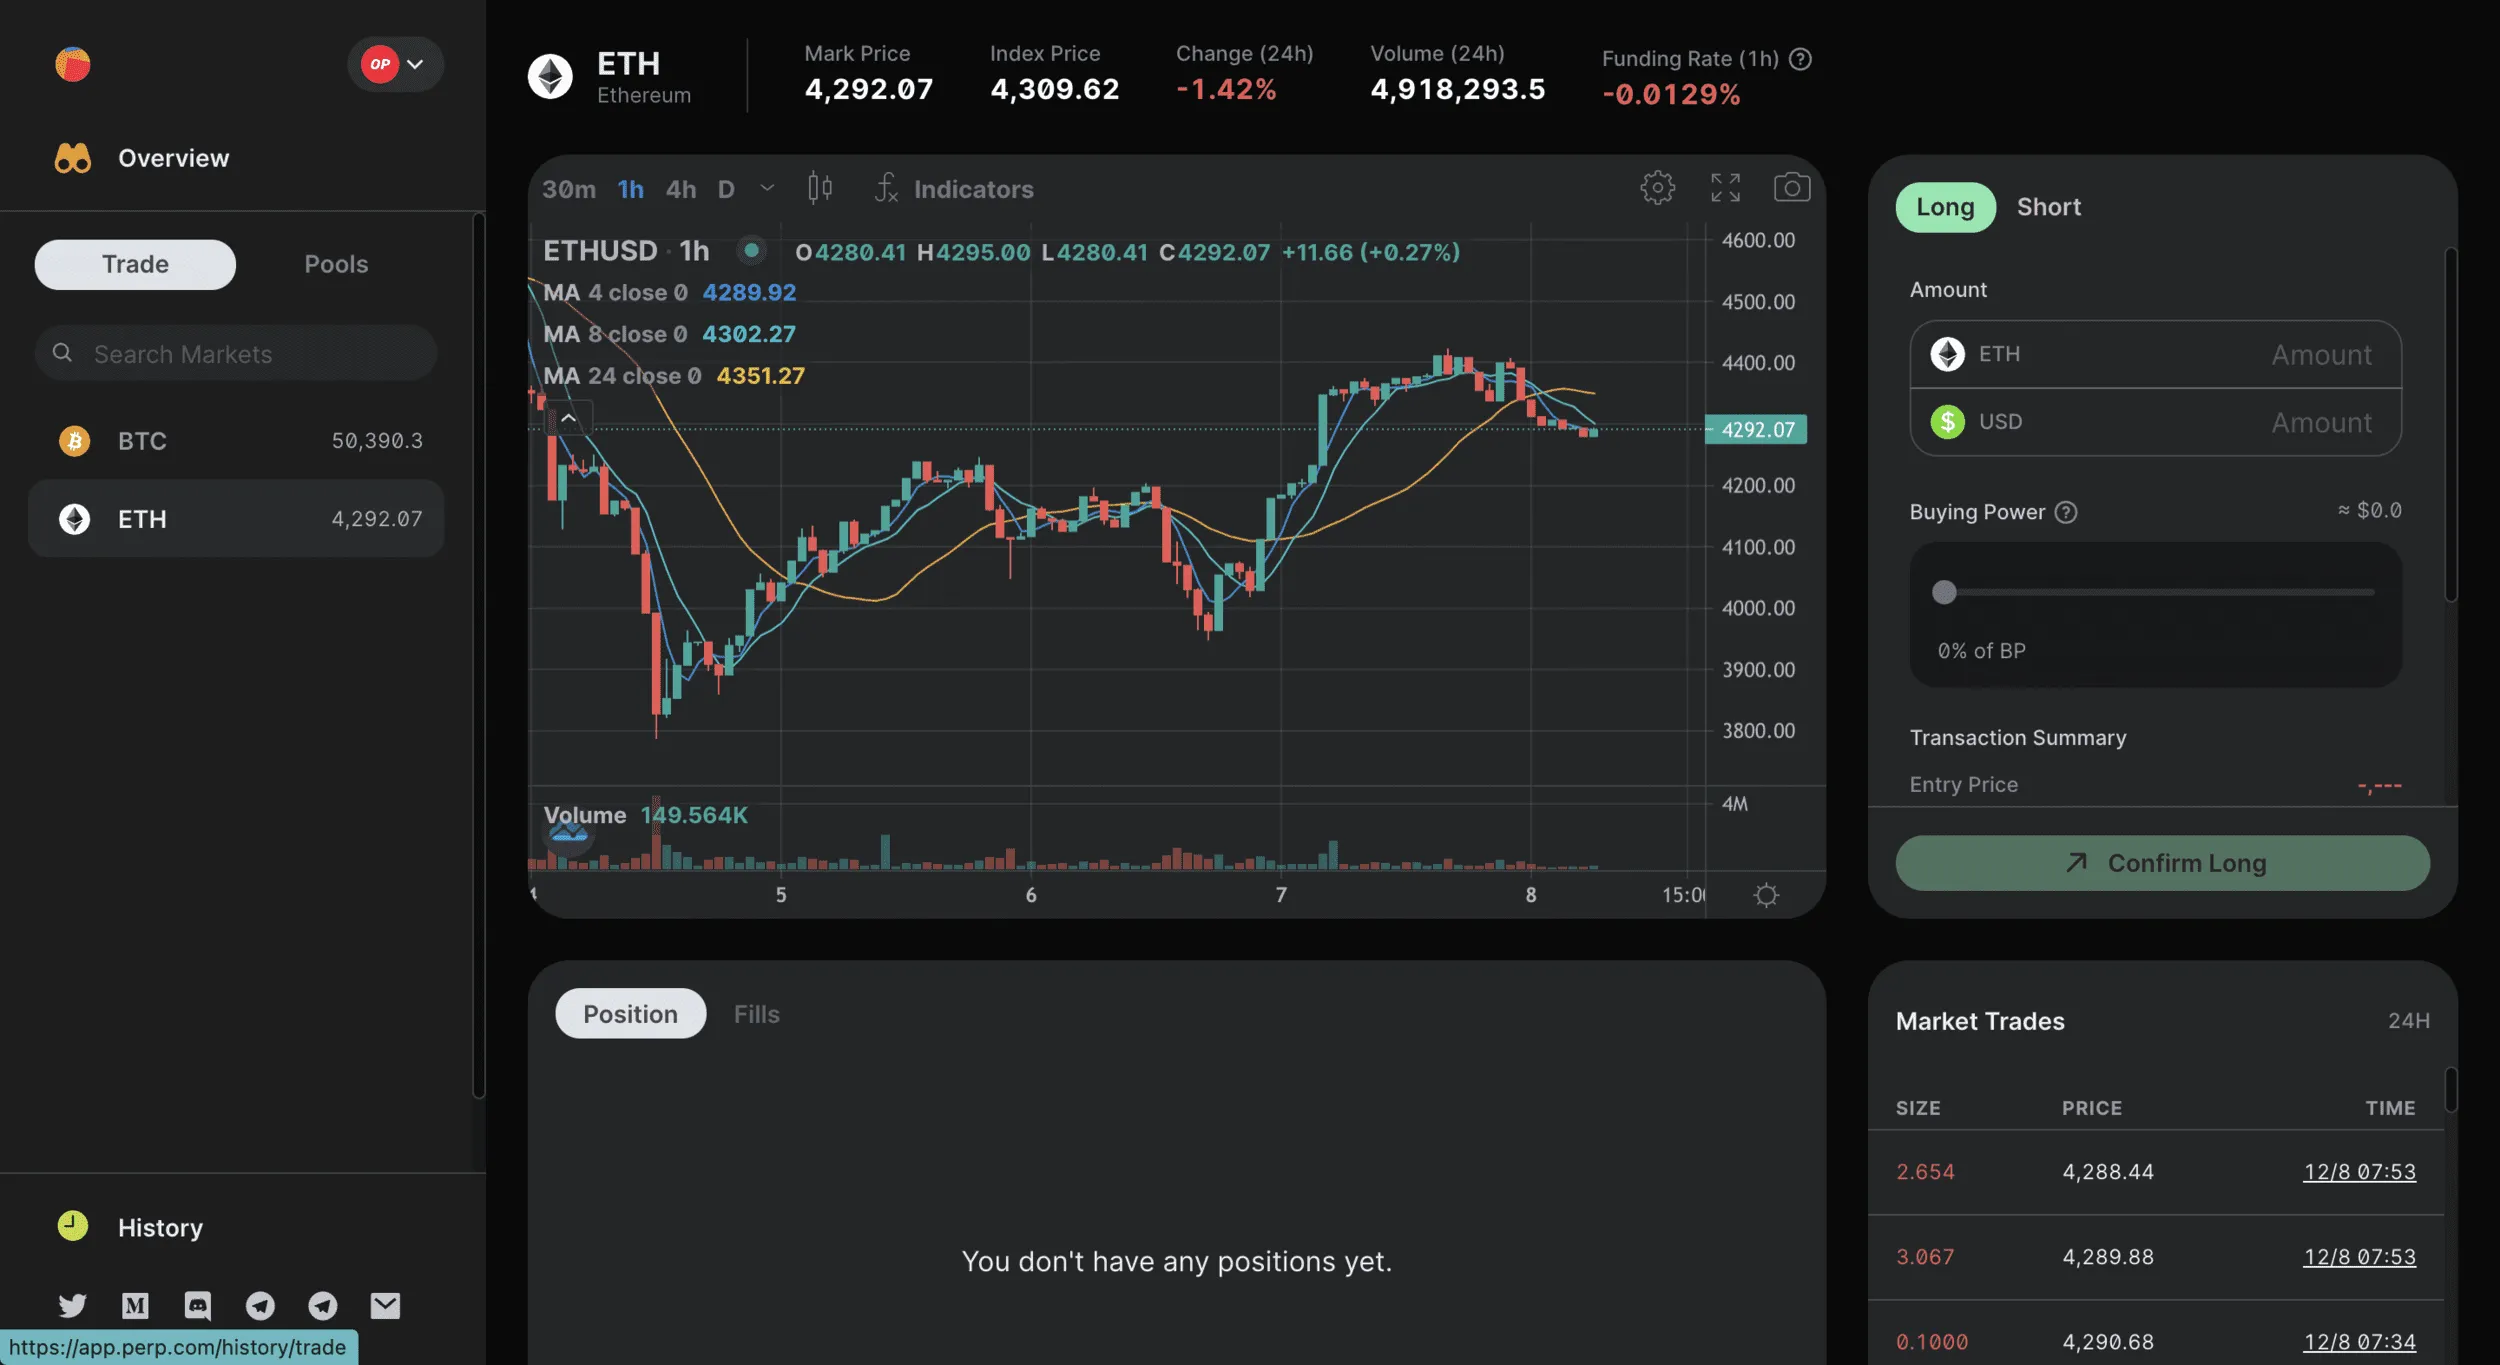
Simply select ETH on the left-hand side, to head to the trading page.
From here, you are going to be met with a load of useful information about this market.
Along the top from left to right:
Mark Price - The price of the ETH perp.
Index price - A aggregated price of ETH from a collection of different exchanges
Change - The change in the price of the perp over 24 hours
Volume - How much in notional volume has been traded in the past 24 hours
Funding Rate - The difference between the perp price and index price, indicates which side (either long or short) pays the other to keep their positions open.
In the bottom right, you have the market trades that are opened as and when they happen.
Let’s open a trade…
Funding is slightly negative meaning that longs are being paid by those shorting. Although this indicates net-bearish sentiment, opening a short position in negative funding doesn’t sit well with me and also, I’m not a filthy bear…
So, to open a long simply head to the top right and select the amount in Buying Power you wish to trade.
I’m going to open a position with 30% of my Buying Power here. If you wish to later increase your leverage then you can withdraw USDC from the exchange or if you wish to reduce your leverage you can deposit further USDC.
This in effect, increases or decreases your Buying Power %. As Perp offers 10x leverage with 100 USDC you could at maximum buying power open a position of 1000 USDC in notional size.
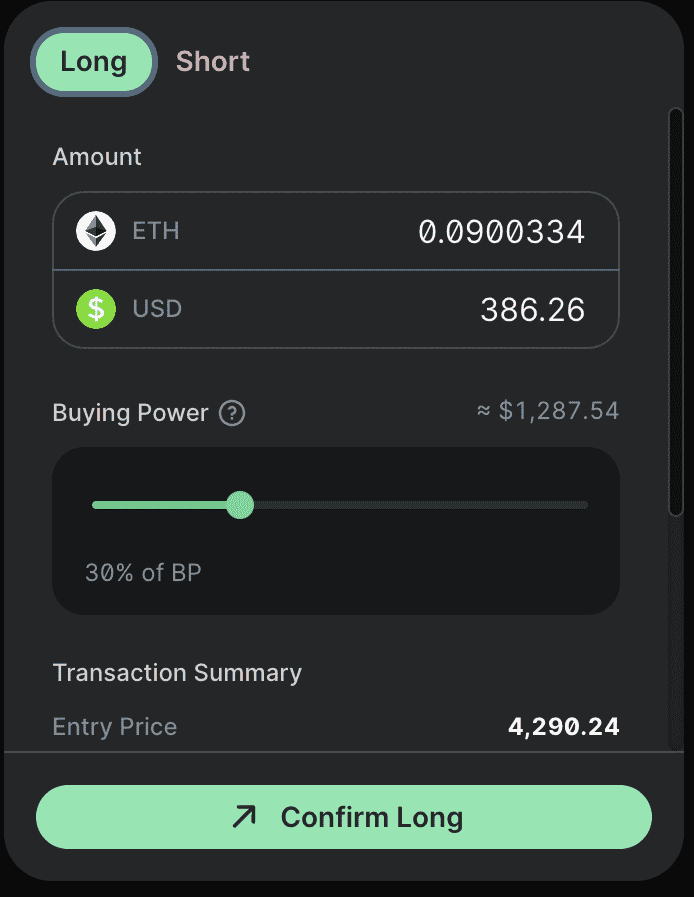
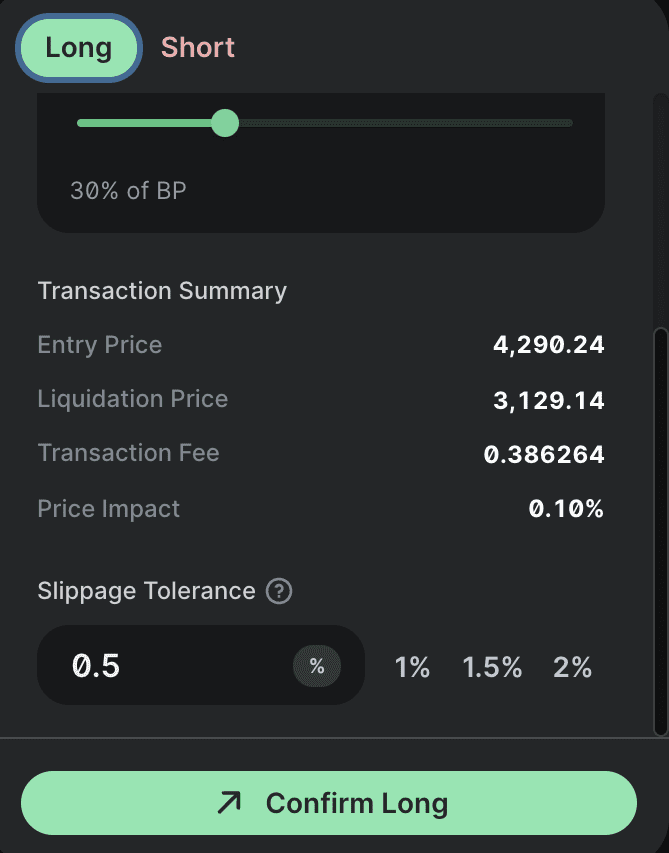
I’m happy with the above, so all I need to do is confirm and approve this trade-in Metamask.
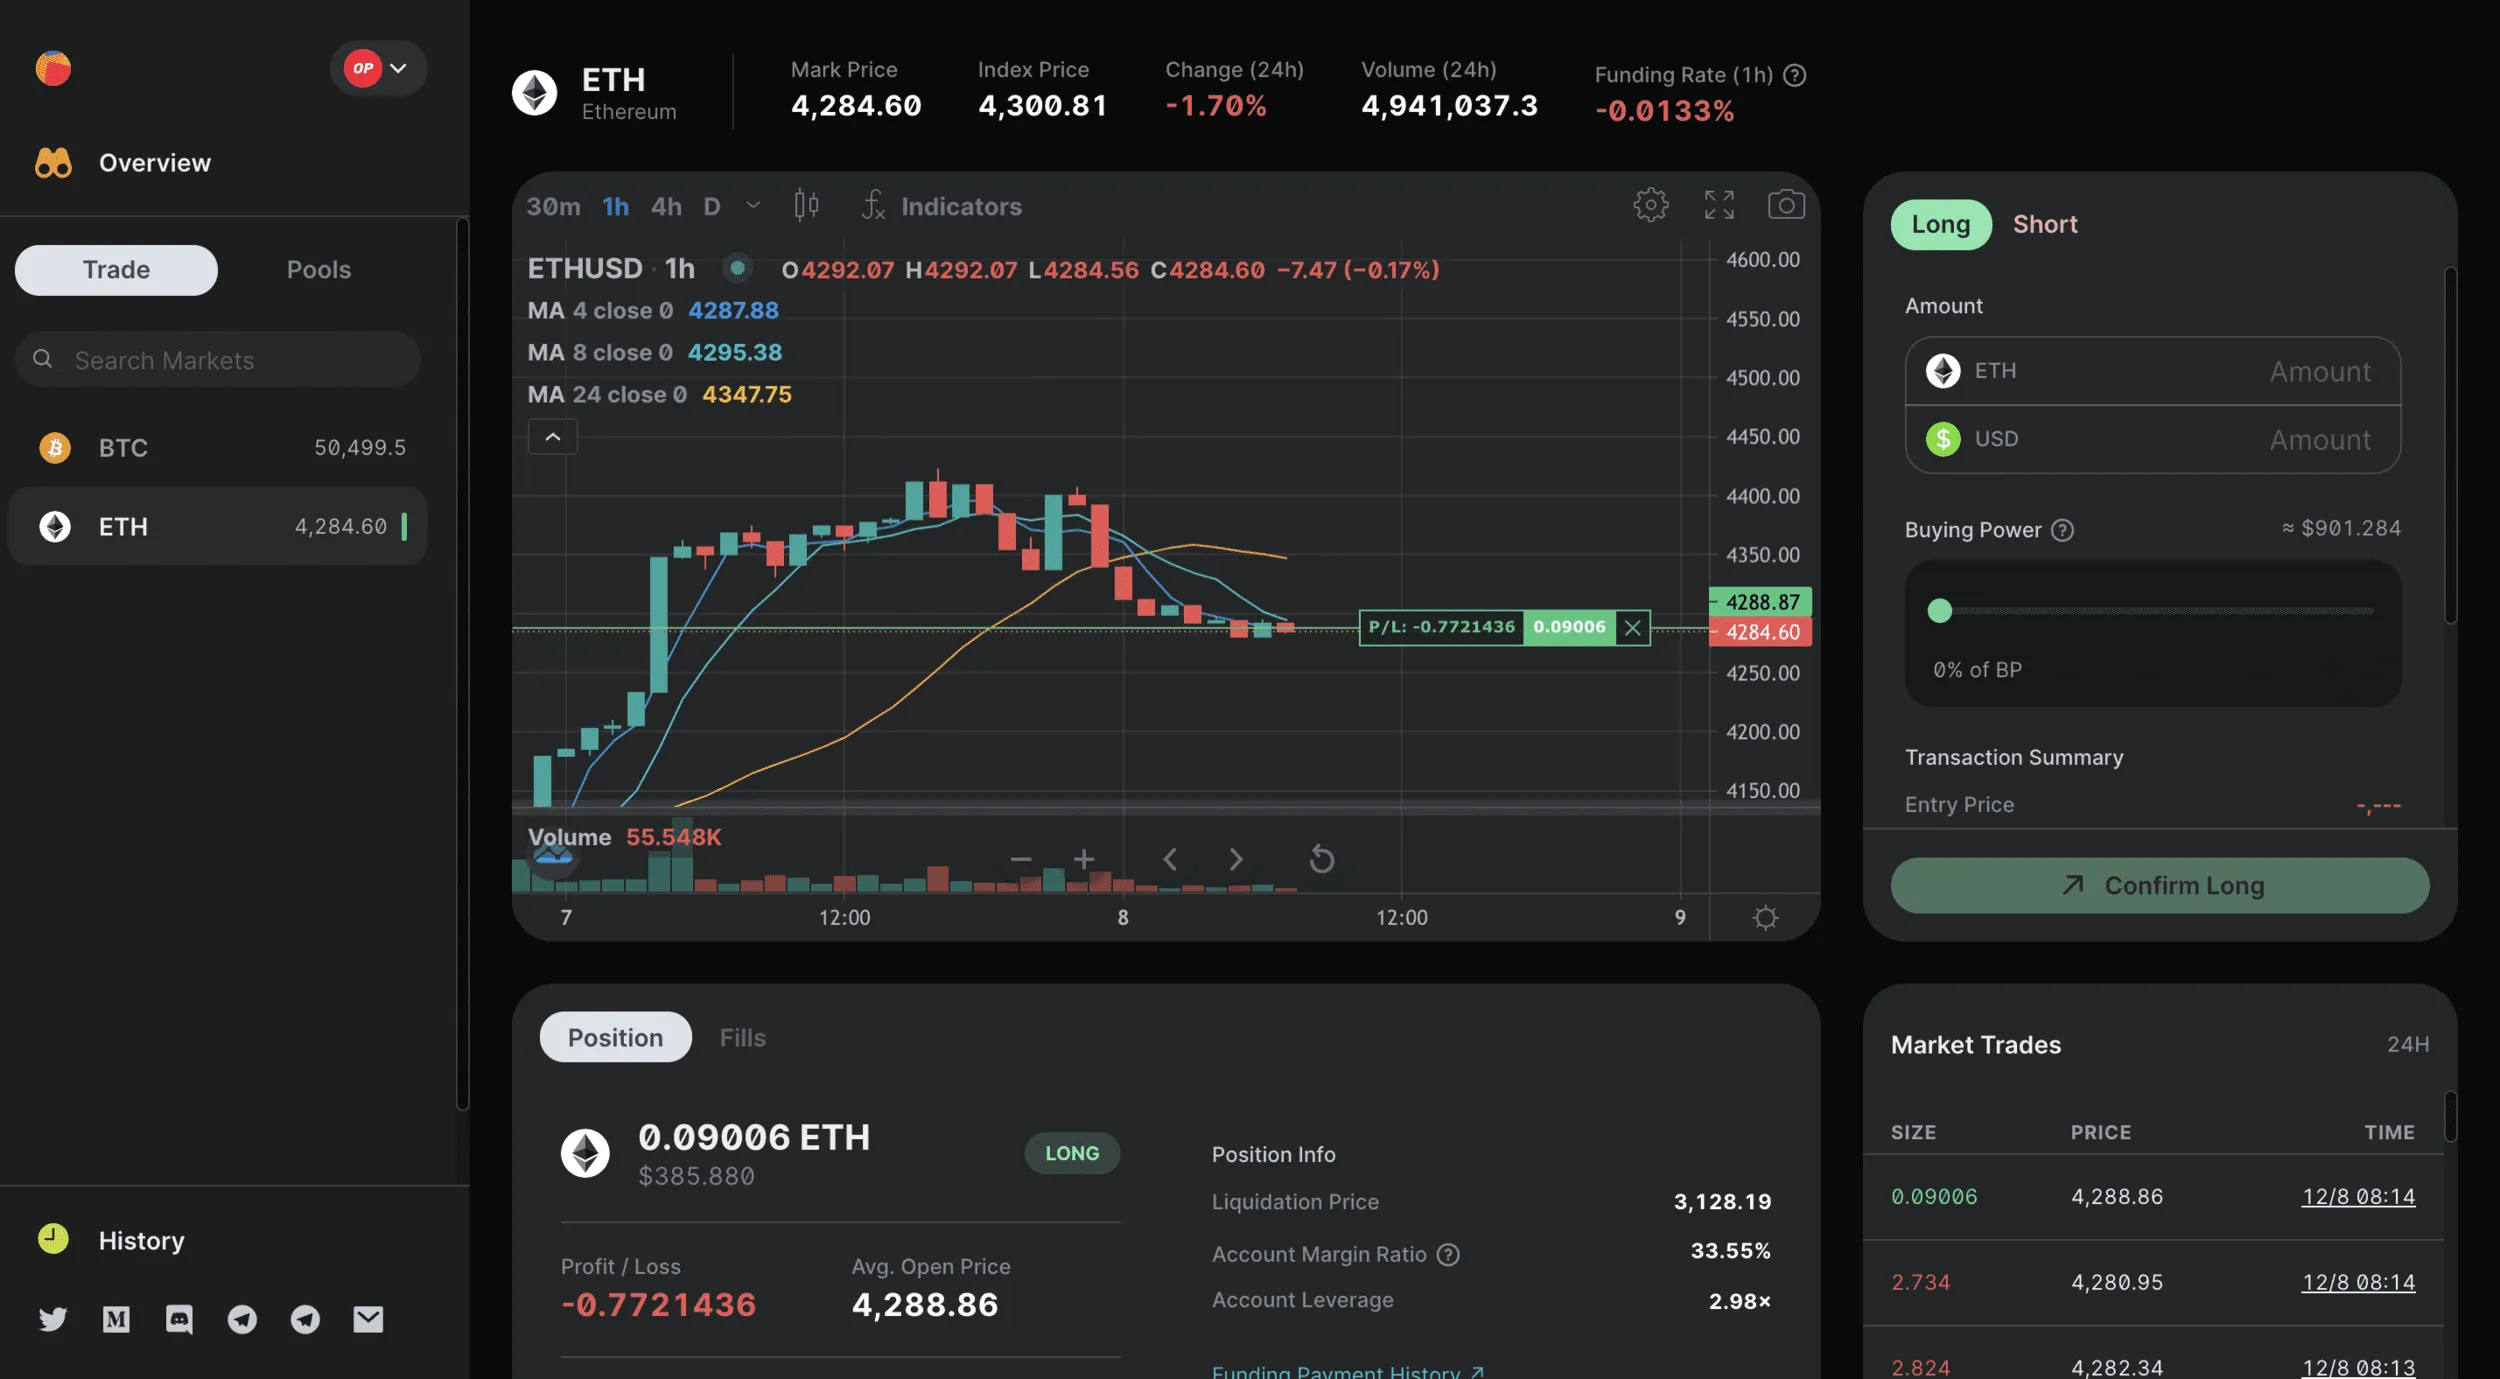
If this is your first time using Optimism, you are going to be very very happy with the speed and cost of these transactions.
Now that the position is open you can see your profit and loss on the chart.
For more information on your position, you can scroll down to this section below.
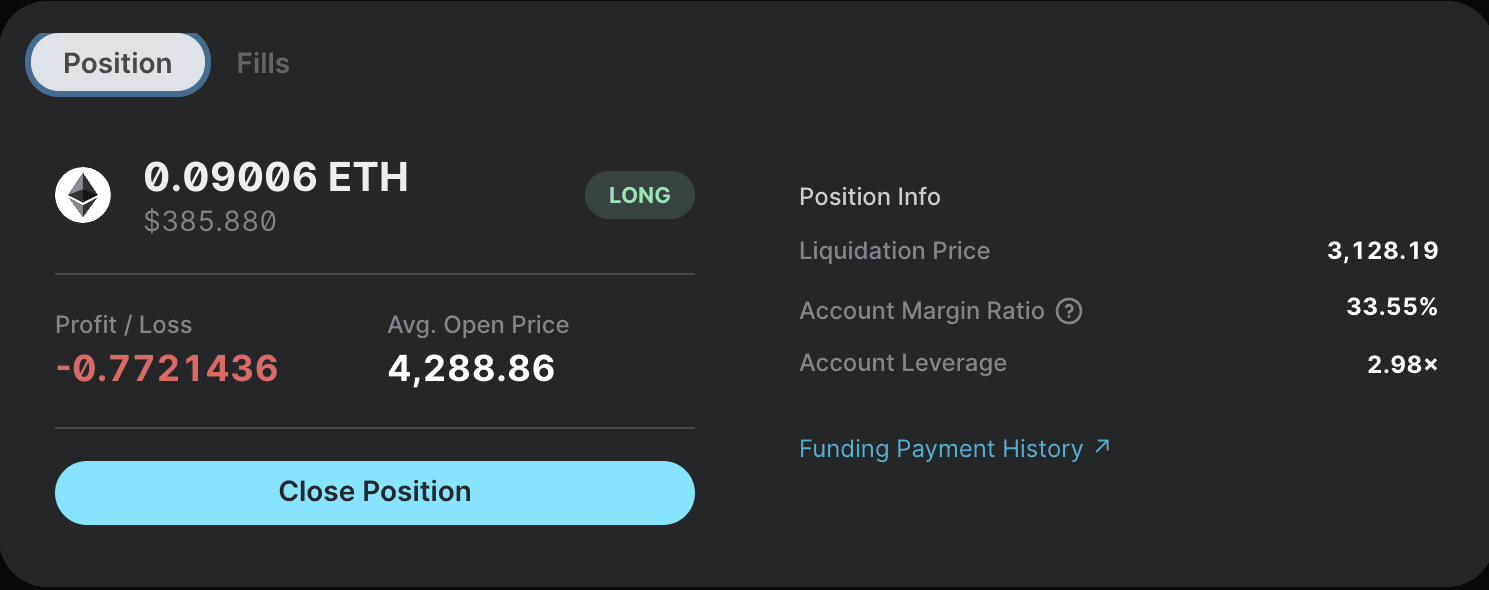
Here, everything is laid out for you in the most user-friendly way possible.
You have your liquidation price, account margin ratio and account leverage. Your profit and loss are displayed in USDC terms too.
The maintenance margin on the exchange is 6.25%. This is a buffer to protect the exchange from risky positions that are close to their liquidation threshold. Keep an eye on your position and always implement proper risk management.
To close the position you can do 1 of 3 things.
- Simply hit close position on the section above, you will need to confirm this in Metamask.
- Hit the cross (x) on the chart. Again, confirm this in your Metamask.
- Open a position of the same size but on the other side of the trade. In this example, I would open a short with the same notional value.
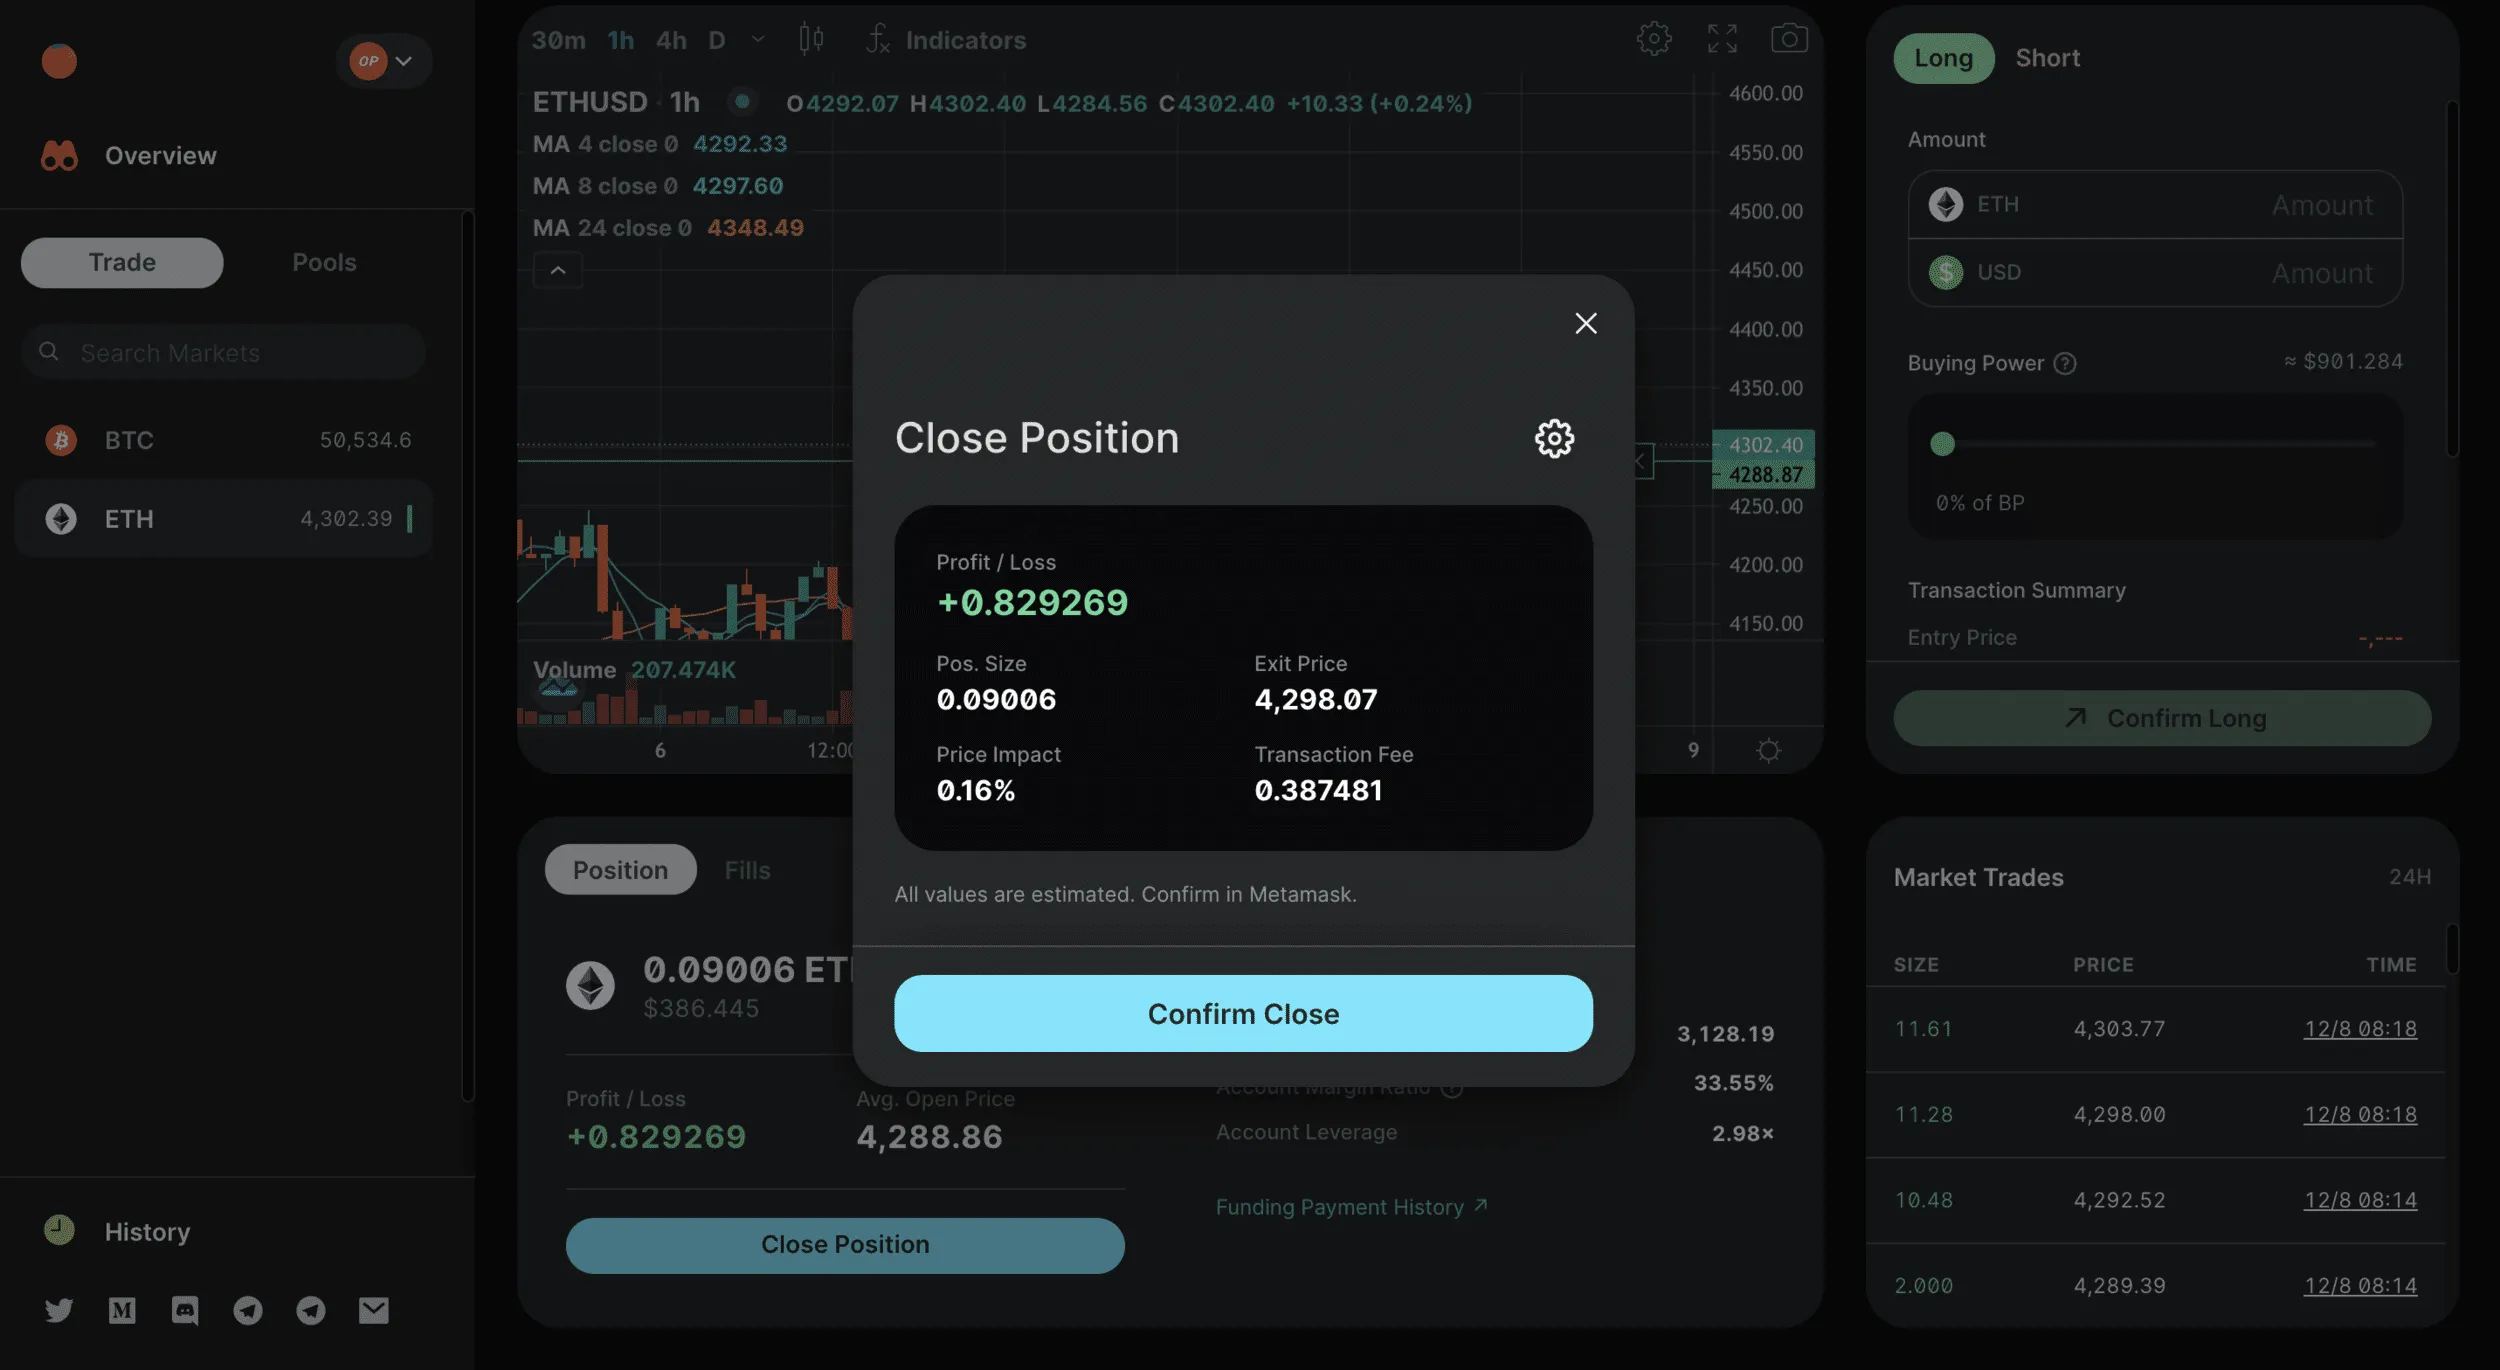
Would you look at that, I’ll be giving away the profits from this trade to one lucky winner. All you have to do is like, retweet and comment on my next post on Twitter.
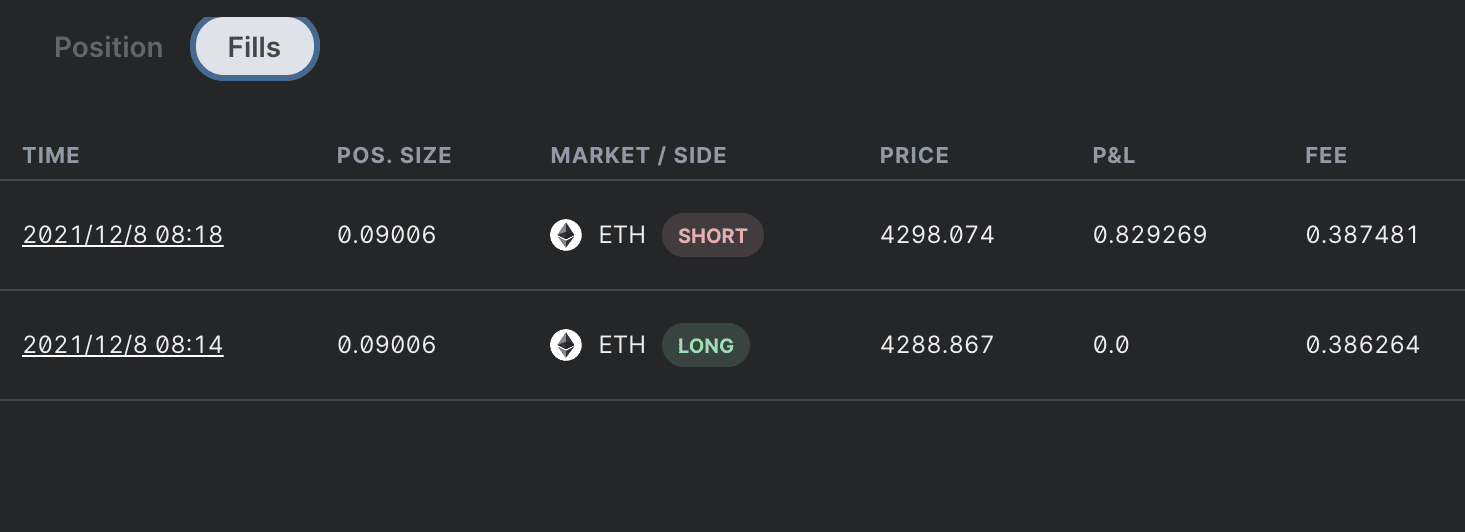
You can see all of your longs and shorts within the bottom section by hitting the “Fills” button.
That is about it!
I’m excited to see the new permissionless pools, limit orders and lots of other features rolled out in the coming weeks. The experience on Optimism is incredible, I think Perp is going to do very well following the move to layer 2.
Please give me a shout if something doesn’t make sense, I am more than happy to help. You can also head to the Perp Discord for direct communications with the team and community.















.webp)

.webp)
.webp)

%20(1).webp)
















%202.webp)


.webp)

.webp)
.webp)
.webp)


.webp)
.webp)

.webp)
.webp)
.webp)


.webp)
.webp)


.webp)


.webp)




.webp)


.webp)


.webp)














.webp)




.webp)









.webp)

.webp)
.webp)

.webp)












.webp)

.webp)


.webp)




.webp)
